Having a home office and gym was at the top of my mind for years now. After putting away some money for about 14 months, I was finally ready to do it. But first, you need to know that grandpa was 73 when he died. He was a simple, brave soul. I have never had a fight with him. Well, at least before dementia kicked in and he used to shout around the home that I was playing too much on my computer. Even so, I loved him a ton and still do, 10 years after his departure. He was an inspiration for me and still is. He’s the kindest human I’ve ever met.

Before he left, grandpa told us to take care of his home. We all live in the house that he built all by himself out of bricks and in years of hard work. But before the big house grandma, grandpa and their two daughters, my mom and my aunt, all lived for years in a wooden house with just two rooms. This was life in Romania about 40 to 50 years ago. Harsh, cramped, and poor.
In this guide:
A project idea met with distress
My family wanted to demolish the old wooden house but I thought otherwise. I made them a deal that I would pay for a complete renovation of it and only take one room. They could go ahead and do whatever they wanted with the other one, like a second kitchen, a lounge area, whatever. They agreed, and so the project was ready to be put into action in late January.
Purpose
The purpose of my room was set: I wanted a big room with two big, bright white lights, hotel carpet floors and just a desk, my treadmill and a weight bench. Nothing else but these things. For the other room, to be honest we’re still debating. But for the most part, we’ve set our minds on a lounge area, a couch and a TV, some other seating area and maybe a buffet for coffee.
Furniture
The first step was to make a list of the materials that we’d need. Besides the actual materials, I started by making some first purchases for the things that I’d need in the room.
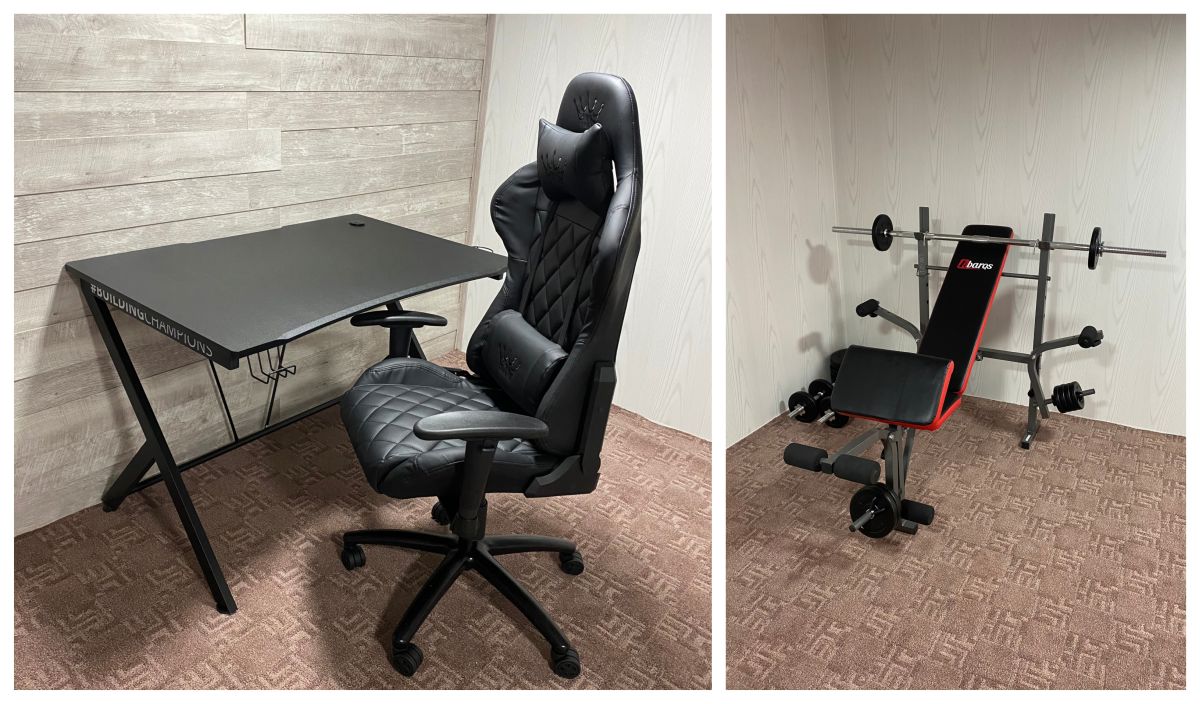
Desk – I got a Trust gaming desk for $160;
Chair – I spend a ton of time in my chair writing, so I got a top-of-the-line gaming chair from Akra Chairs for $140;
Weight bench – I went for the middle one as I’m a beginner, and it was $135;
Weights – These came separate and cost me $75.
Materials
For the materials, I also went for the middle priced stuff. This is a room that I’ll mostly be using, so there’s no need for pretentious stuff inside. Most of our house is like this, simple, yet functional, almost minimalistic. Materials were mostly wood panelling or wainscot, of which one wall was dressed in a special, German, extremely expensive 3D type, as well as the carpet, the lights, a door and a window, and some zinc coated profiles that made the structure on which we’ve installed the wainscot. Oh, and a ton, literally a ton of nails of all types. Oh, so many!!!
Wood panelling – white, simple, middle priced, 54 squared meters per room, $235;
3D wainscot – 5 squared meters + clippers, $110;
Carpet – hotel type, a little expensive, 4×4 meters, $83;
2 LED lights – simple, no fuss there, $25;
Wooden door – just a simple design, $86;
PVC window – sort of expensive as we were forced to order one by the dimensions of the old one, as we could not break into the wooden walls to fix a normal-sized window, $60;
Zinc coated profiles – tons of these, used to make the frame where we’ve put the actual wood panelling, they were $115;
Nails – probably over $1.000, but let’s just say they were about $50;
Others – this includes everything else that was not reported above, at $150.
Total price was $1.424 for my room. Well, after converting all of the money from Romanian Leu to USD, I’ve noticed it might be a tad lower at $1.282, so yeah… somewhere at $1.350 for the entire thing. Now before you talk about how rich I am with your friends, remember that I’ve managed to gather this money in about 14 months. More than a year!
I’d say more, but let’s say 14, which means the entire room cost is less than $97 per month. Considering I have no rent to pay and no other debt, putting those $100 per month away was easy! For the other room, we only have the materials ready, so we’re not going to say it’s the same. But considering how expensive furniture is, we might surpass that.
Before
Luckily, my dad is great with constructions. He’s a natural at it, so the cost of labour was zero. But before diving into the pictures, I’m going to be honest: the entire process is time-consuming, nerve-wracking and extremely delicate. We’re talking 50-year-old wooden walls and a ceiling that was barely there and we had to improvise on keeping it together.
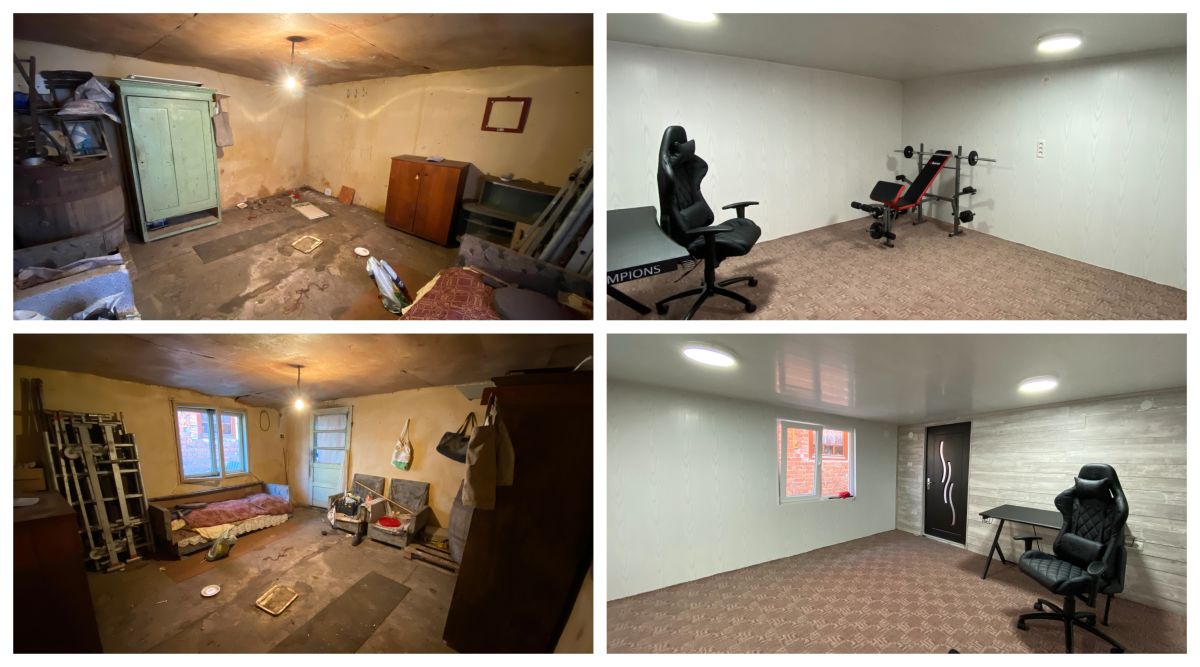
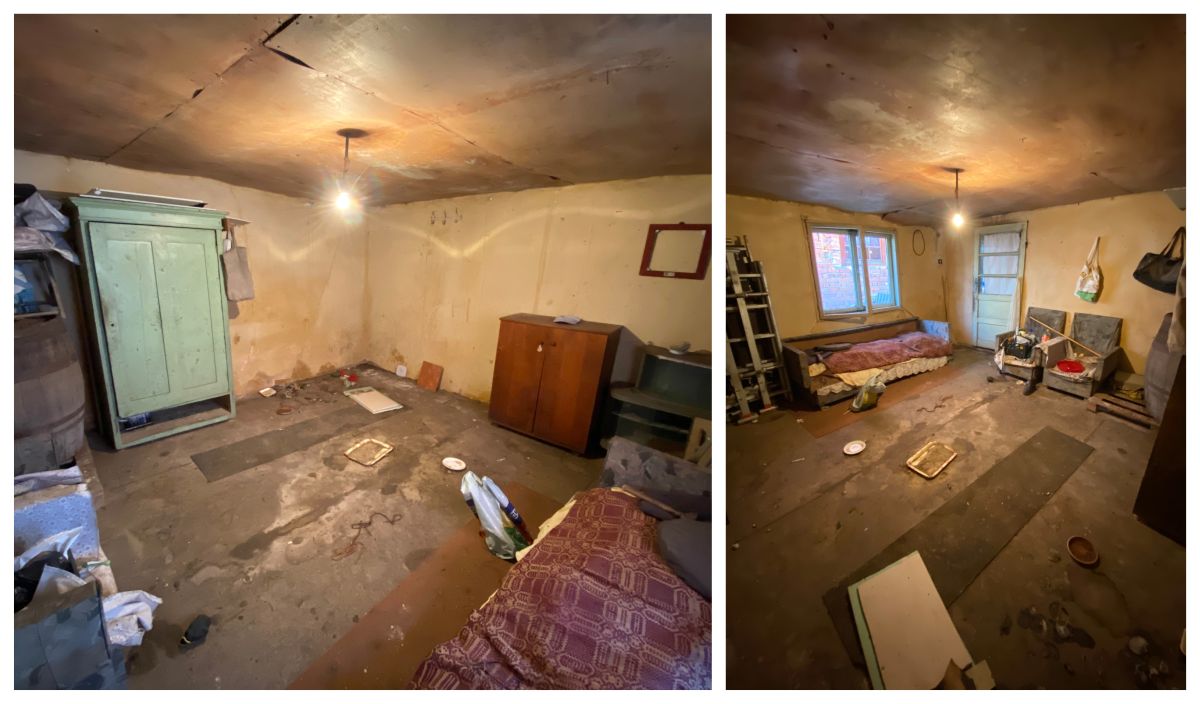
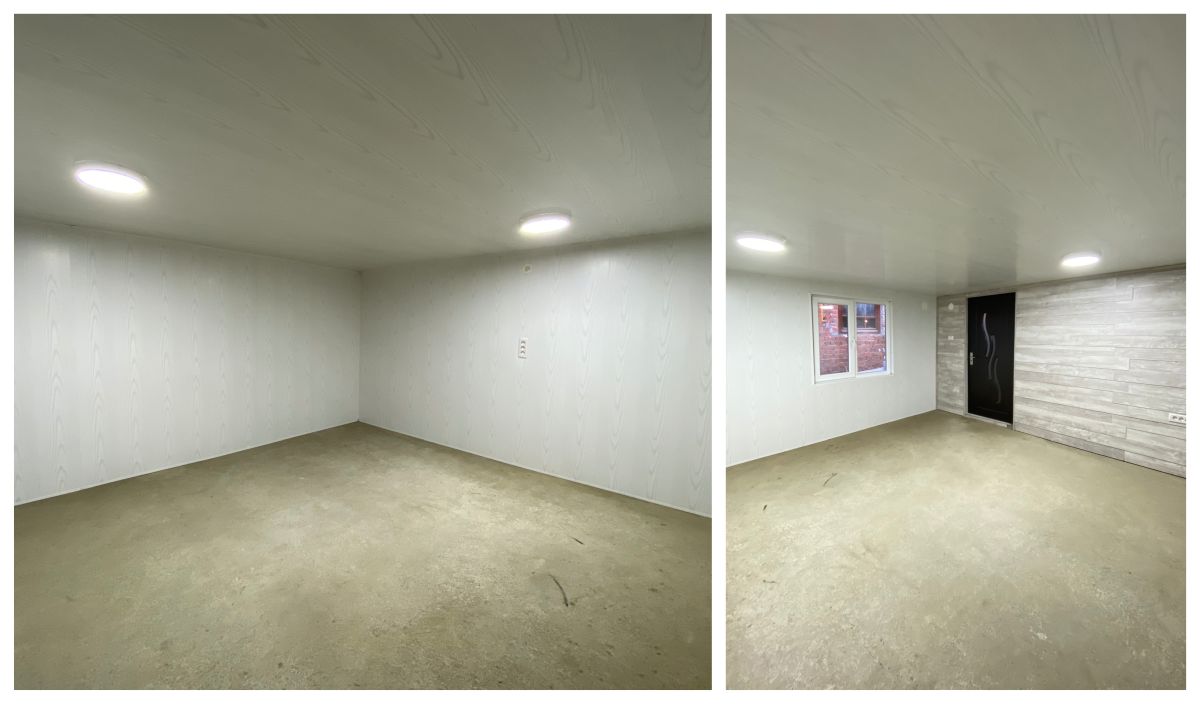
All right, the thing you’re all here for: the pictures! This first one is the room from before touching it. This is what it looked like. It was a mess: old furniture nobody touched in years, dust and other garbage, rusty walls, terrible smell. It was hell, as you can see. The first larger picture is from the door, while the other smaller on the right is from the opposite angle. We’ll keep this all the way through the article.
During
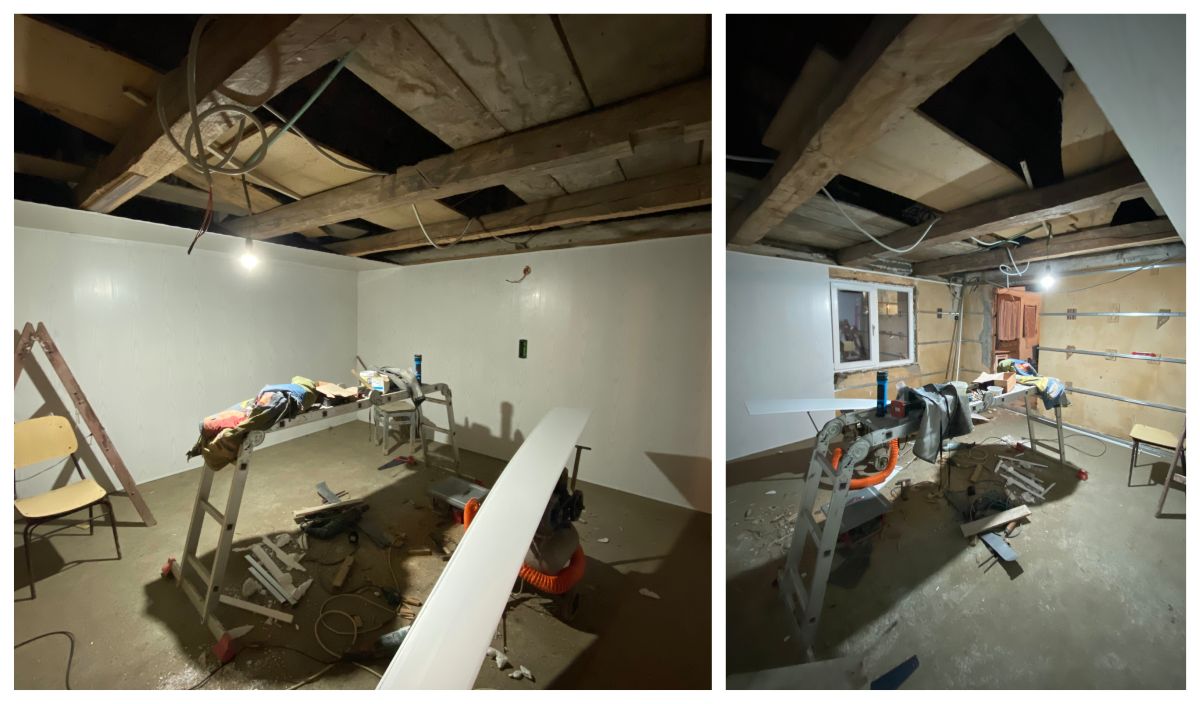
We started out with cleaning the mess up. Next, we put on the frame and started with the concrete floor, as the old one was made out of some mud and something else, and was uneven.

Next, we started on the walls after the concrete had settled. It took about two days for that to happen. We begin by doing the first three walls with the regular wood panels, the white ones. These were easy to put together in general. On some parts though, they were hell!
Here’s the complete room after putting in not just the walls but also the ceiling, which is also made out of the same wood panels. The ceiling was the most demanding part. I don’t even want to recall that, as it was a crapload of work.
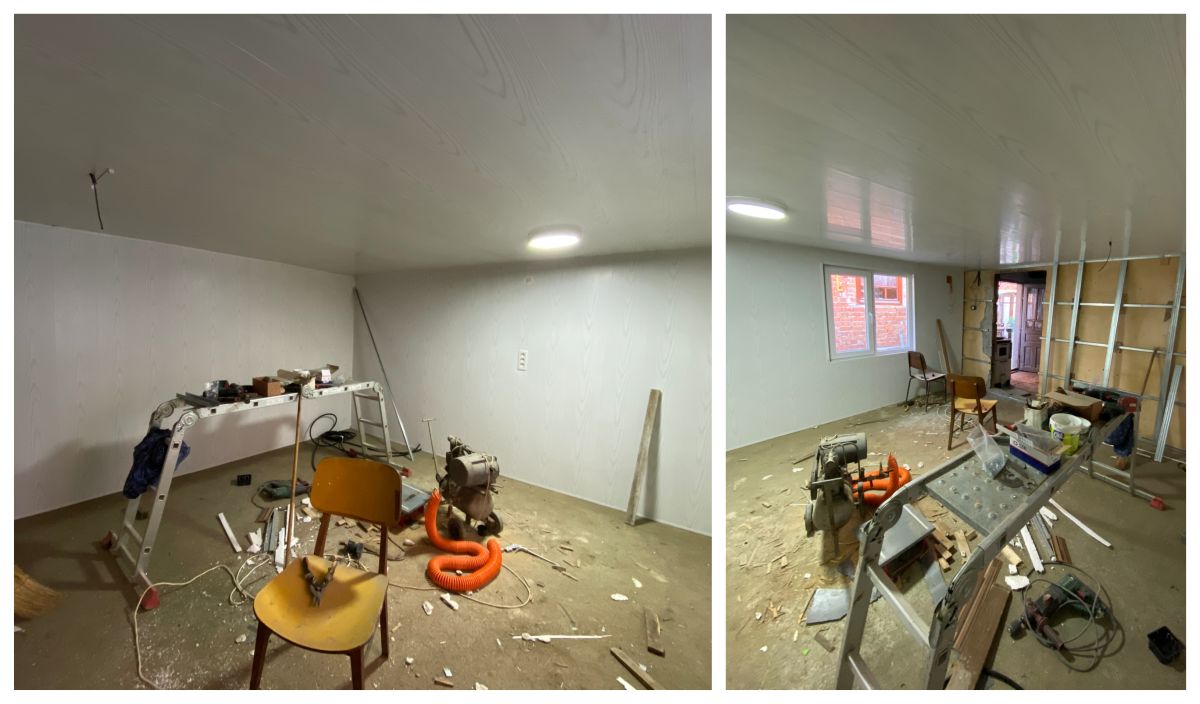
Next came the door and the last wall, the one with the 3D panelling. This was also a tad demanding as there were different framing structuring and clippers for it. In the end, though it was all worth it as the room looks different, modern, cooler than if it were just with white panelling.
I’m glad we spent the extra few bucks and got this for wall number 4.
After
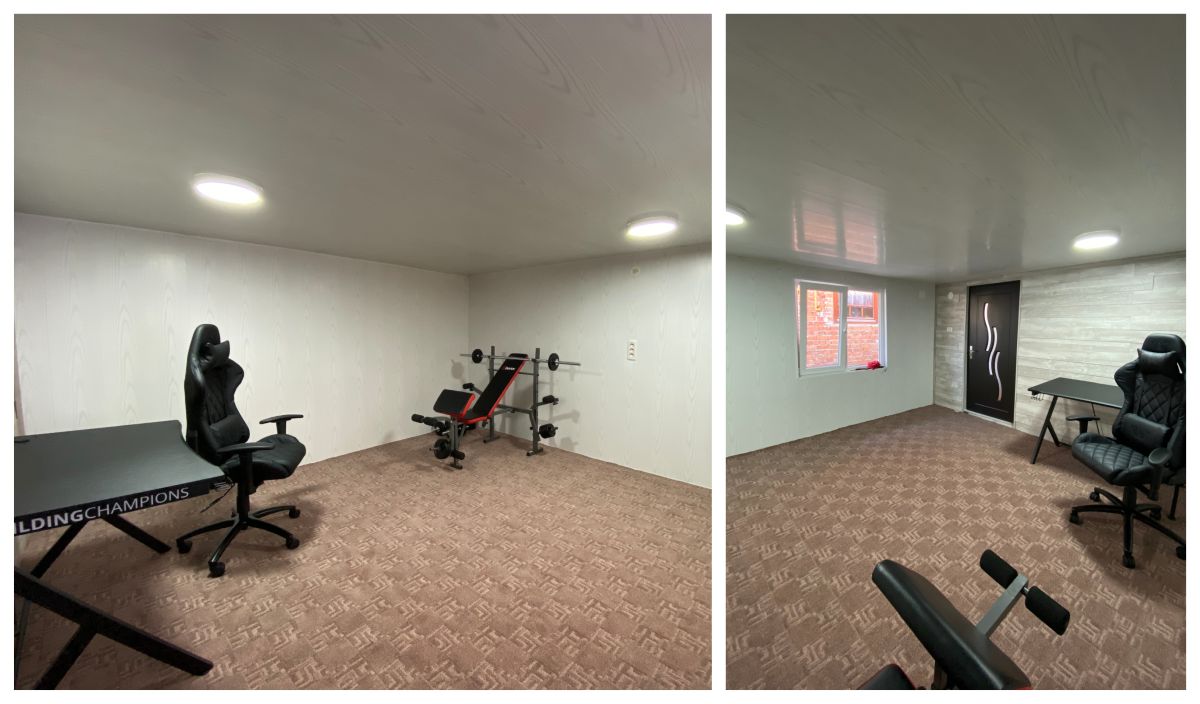
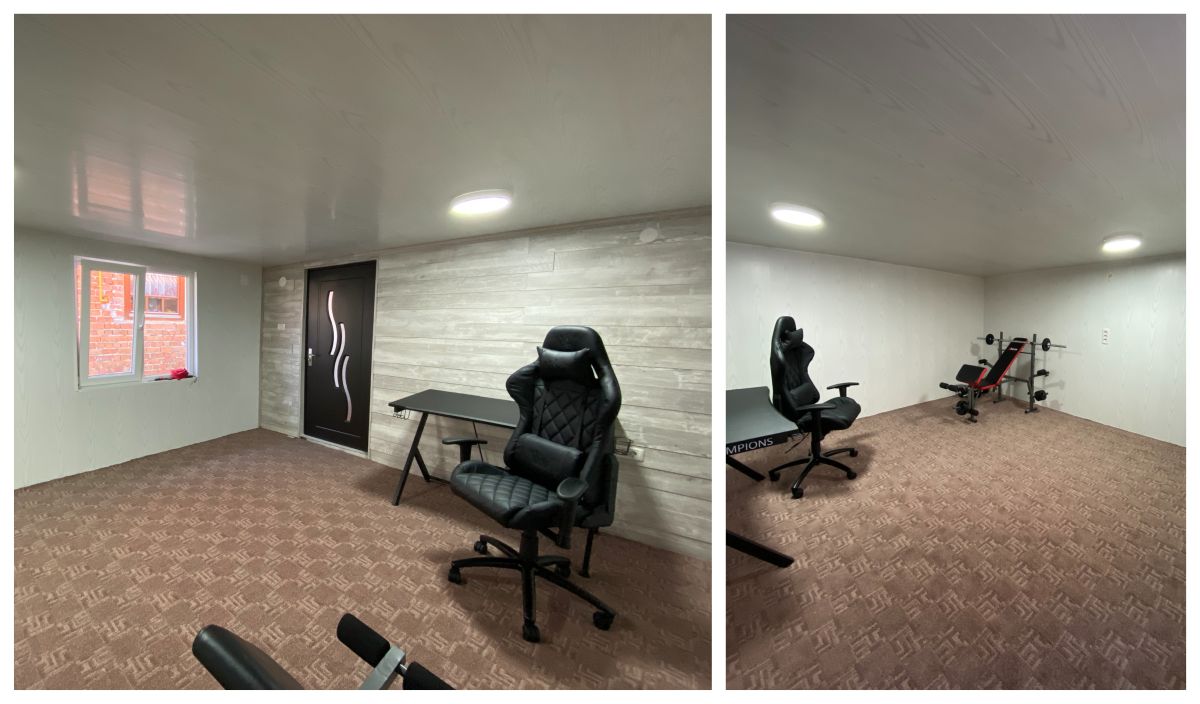
The last step was to put in the carpet, as well as putting the furniture together and installing it into the room. The space is huge so, without the treadmill, which is not yet installed here, it looks empty. This was my idea, I want it to be spacious, not cramped, easy to navigate. I’ll just leave you with some pictures now as the room looks in this moment. Enjoy!
So there you have it! That’s how you put together a little restoration project at home during a pandemic. It’s not that hard if you have an idea about what you’re doing. If you know how to put some panels together and can use a screwdriver and follow some instructions, you can do this too. I hope you find this material useful and inspiring. Now going back to work in room #2.
—
Hi! My name is Gabriel, nice to meet you.
I run Gabriel Iosa Writing Services, my online dream business that’s now 4 years in the making. I’ve also worked as a journalist for 9 years and counting. My job is to come up with the best content for you regardless if it’s for your blog, website, book, social media posts or anything else. I can also help you with organic or paid reach so that you can put your products or services right in front of your future clients.
If you enjoyed this article, shoot me an email with a few details about your project. We’ll take it from there.


[…] Check this one out: Probably the coolest thing you can do during a pandemic! […]
[…] Desk and chair: Investing around $500 in a desk and chair that are designed for gamers was the best buy of my life. One year in, these two tools have […]